How to Configure a Modern TV Properly
When I bought a recent OLED television and the latest Apple TV, I assumed the best picture would come automatically. I enabled HDR, selected the most advanced-looking options and expected the hardware to take care of everything.
What I eventually discovered was that many default settings are designed to make the image look brighter, sharper or more immediately impressive, rather than to preserve the way the content was mastered. The television may add processing, the playback device may convert one format into another, and the result can drift away from what the filmmaker or game developer intended.
This article explains the settings I changed to make films, television and games look closer to their original presentation.
TL;DR
- HDR output should not be permanently enabled for all content.
- Set Apple TV to 4K SDR by default and enable Match Dynamic Range and Match Frame Rate.
- Use Filmmaker Mode for films and television.
- Use HGiG for a gaming console.
- Use Apple TV colour-balance guide
Apple TV
For years, I had my Apple TV configured incorrectly. I selected 4K HDR as the default format because it seemed logical for an HDR television. However, this setting does not simply enable HDR support: it instructs the Apple TV to output an HDR signal by default, including when the original content is SDR. Unless content matching is enabled, the Apple TV converts video into the format selected under Settings → Video and Audio → Format. In my case, SDR and Dolby Vision video were converted to HDR. This made all SDR content looked washed out and ignor Dolby Vision capabilites of the TV.
For a setup used mainly for YouTube, a sensible configuration is:
Settings → Video and Audio → Format → 4K SDR at 60Hz
Then open Match Content and enable:
- Match Dynamic Range: On
- Match Frame Rate: On
Match Dynamic Range keeps SDR content in SDR while allowing HDR10 and Dolby Vision to activate when supported by the video. Match Frame Rate allows content to play at its original frame rate rather than being converted to the Apple TV’s default refresh rate.
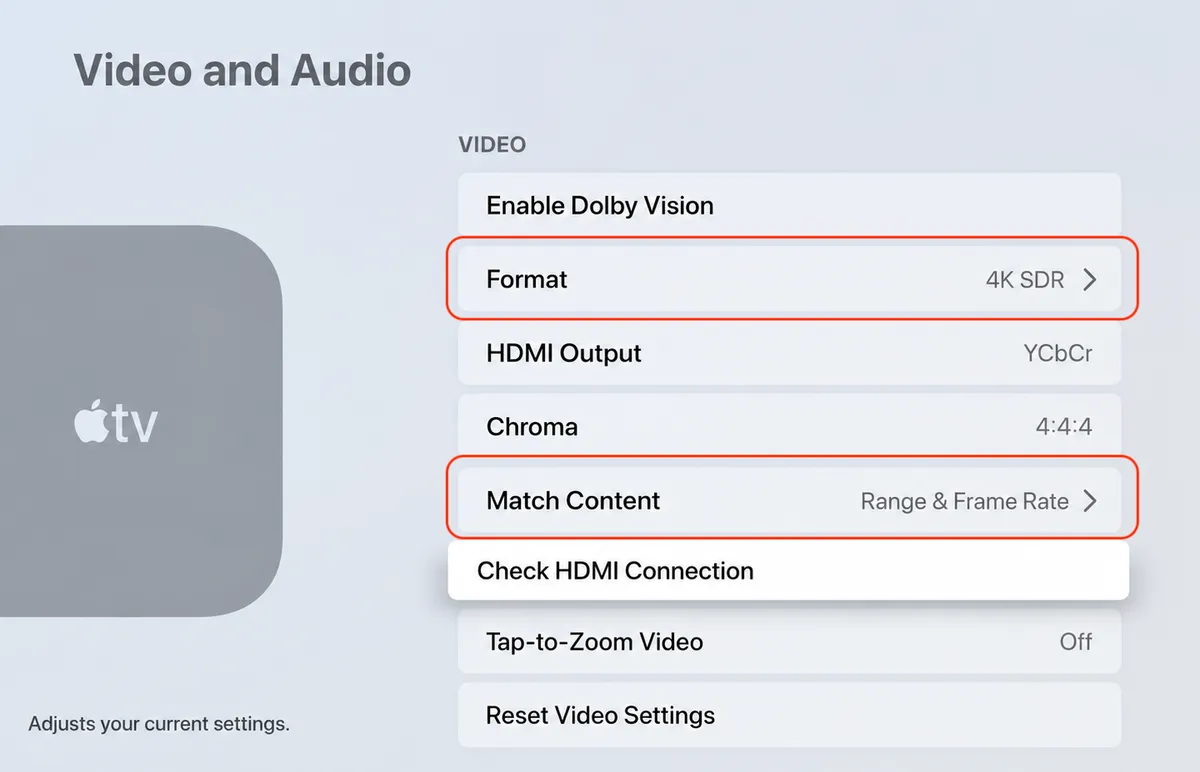
With these settings, the Apple TV interface and ordinary videos remain in SDR. When HDR10 or Dolby Vision content begins, the Apple TV changes its output and the television enters the appropriate picture mode. The screen may briefly turn black while the dynamic range or refresh rate changes; this is normal. On the LG C4, a notification appears in the top-right corner when HDR10 or Dolby Vision activates, which can be checked by starting content in the corresponding format.
The default format should reflect the type of content watched most often. Because most of my daily viewing is SDR YouTube video, 4K SDR at 60Hz minimises unnecessary conversion and reduces how often the television has to switch formats.
Configure the Television
Modern televisions often apply substantial image processing before the picture reaches the panel. Although these processing features are intended to make the image appear more impressive, they can introduce visible side effects. Sharpening may create bright outlines around objects. Motion interpolation can make films look unnaturally smooth and may also introduce motion artefacts, such as warping or invented movement around fast-moving objects that was not present in the original video.
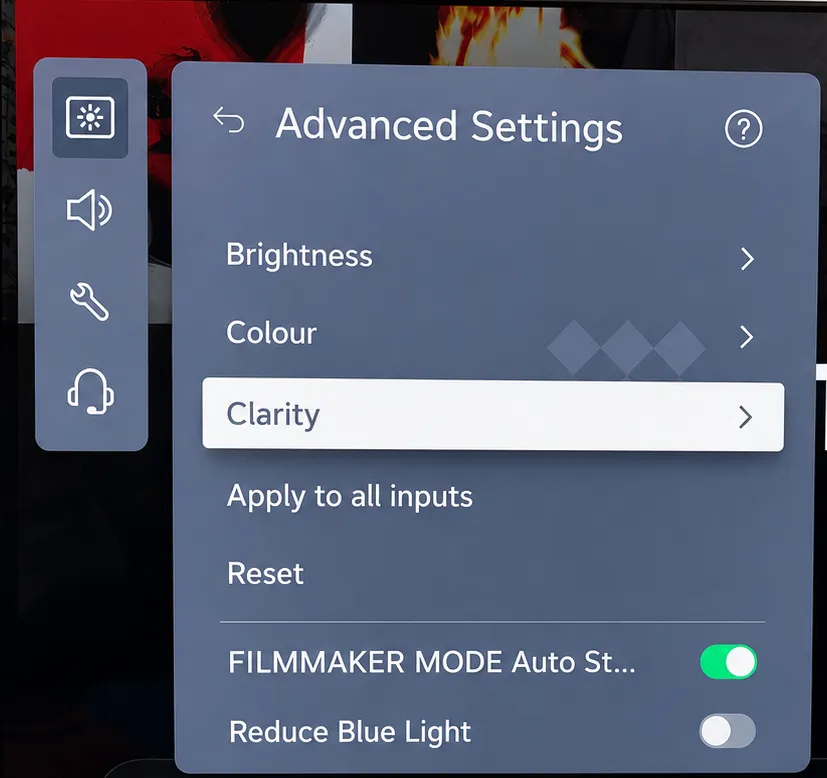
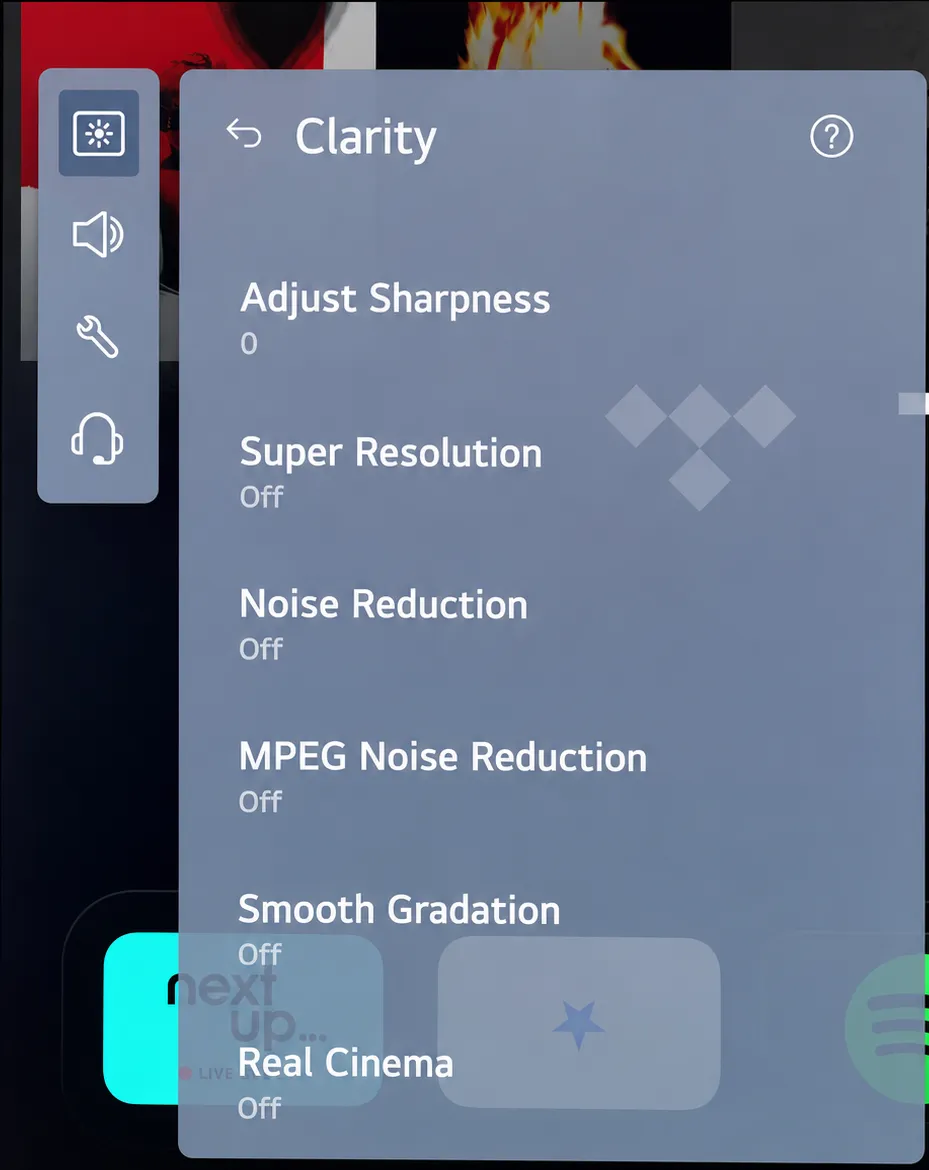
Enable Filmmaker Mode where available. It is designed to minimise unnecessary processing and preserve the content’s original frame rate, colour, contrast and aspect ratio. Then check the advanced picture controls and disable additional enhancements such as artificial sharpness, Super Resolution, noise reduction, smooth gradation, dynamic contrast, and motion or frame interpolation.
Picture settings are normally stored separately for SDR, HDR10 and Dolby Vision. Play a video in each format, open the television’s picture settings while it is playing, and repeat the configuration for all three modes.
Optional: Calibrate Apple TV Colour Balance
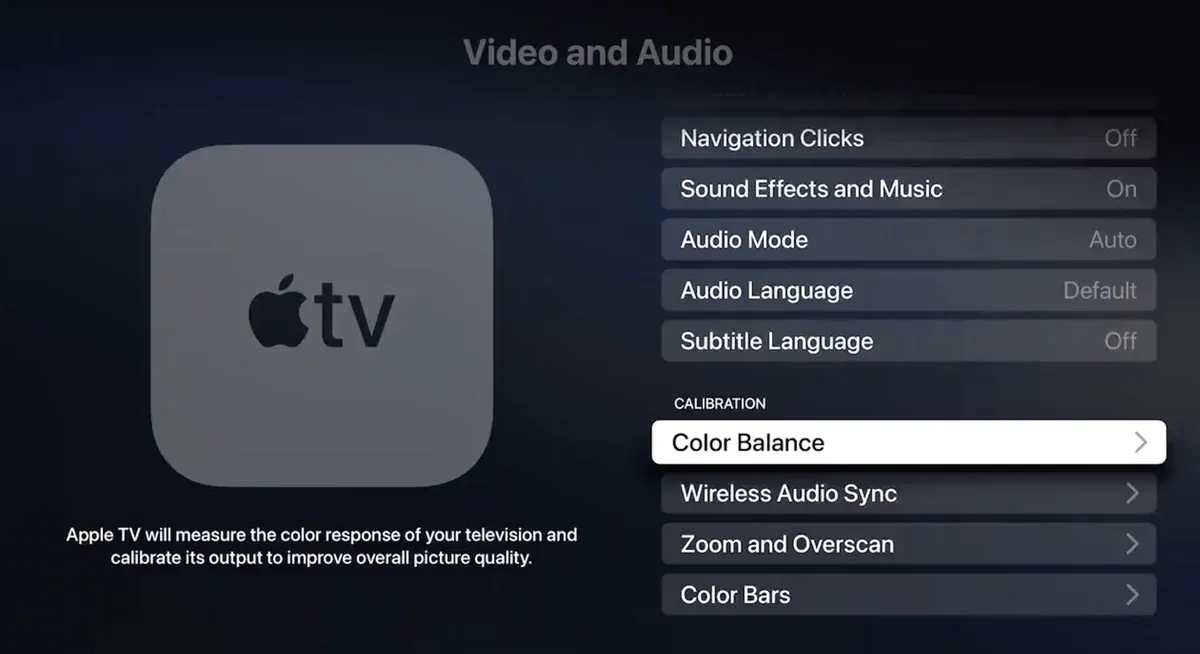
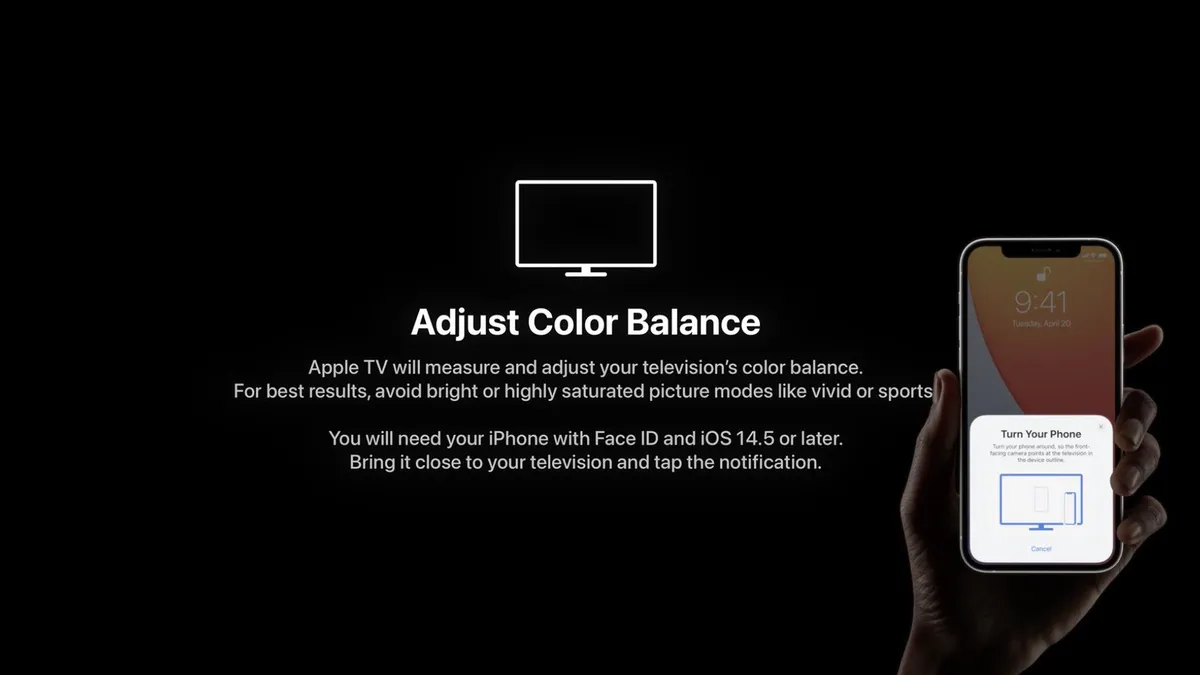
After configuring the television’s picture settings, Apple TV can use the sensors in a Face ID-equipped iPhone to measure the displayed image and adjust its own video output for a more neutral colour balance.
Open Settings → Video and Audio → Calibration → Colour Balance, unlock the iPhone and follow the instructions shown on the screen. Hold the front of the iPhone close to the marked area on the television until the measurement is complete. Apple TV will then show a comparison between the original and adjusted image.
This adjustment applies only to video produced by the Apple TV; it does not recalibrate the television or affect other connected devices. It should therefore be treated as a final correction rather than a replacement for selecting an accurate picture mode such as Filmmaker Mode.
The feature is not used with Dolby Vision, where compatible devices already use Dolby Vision metadata and display processing to map the image. More detailed instructions are available in this Apple TV colour-balance guide.
Configure HDR on the PlayStation
Set HDR to On When Supported under Settings → Screen and Video → Video Output. This ensures that the PlayStation outputs HDR only for games designed to use it, rather than converting SDR games into HDR.
If the television supports HGiG, start an HDR game or open the PlayStation’s Adjust HDR screen before looking for the option. Television settings are often stored separately for SDR and HDR, so HGiG may appear only while the TV is receiving an HDR signal. On recent LG televisions, it is available under Settings → Picture → Brightness → Dynamic Tone Mapping → HGiG.
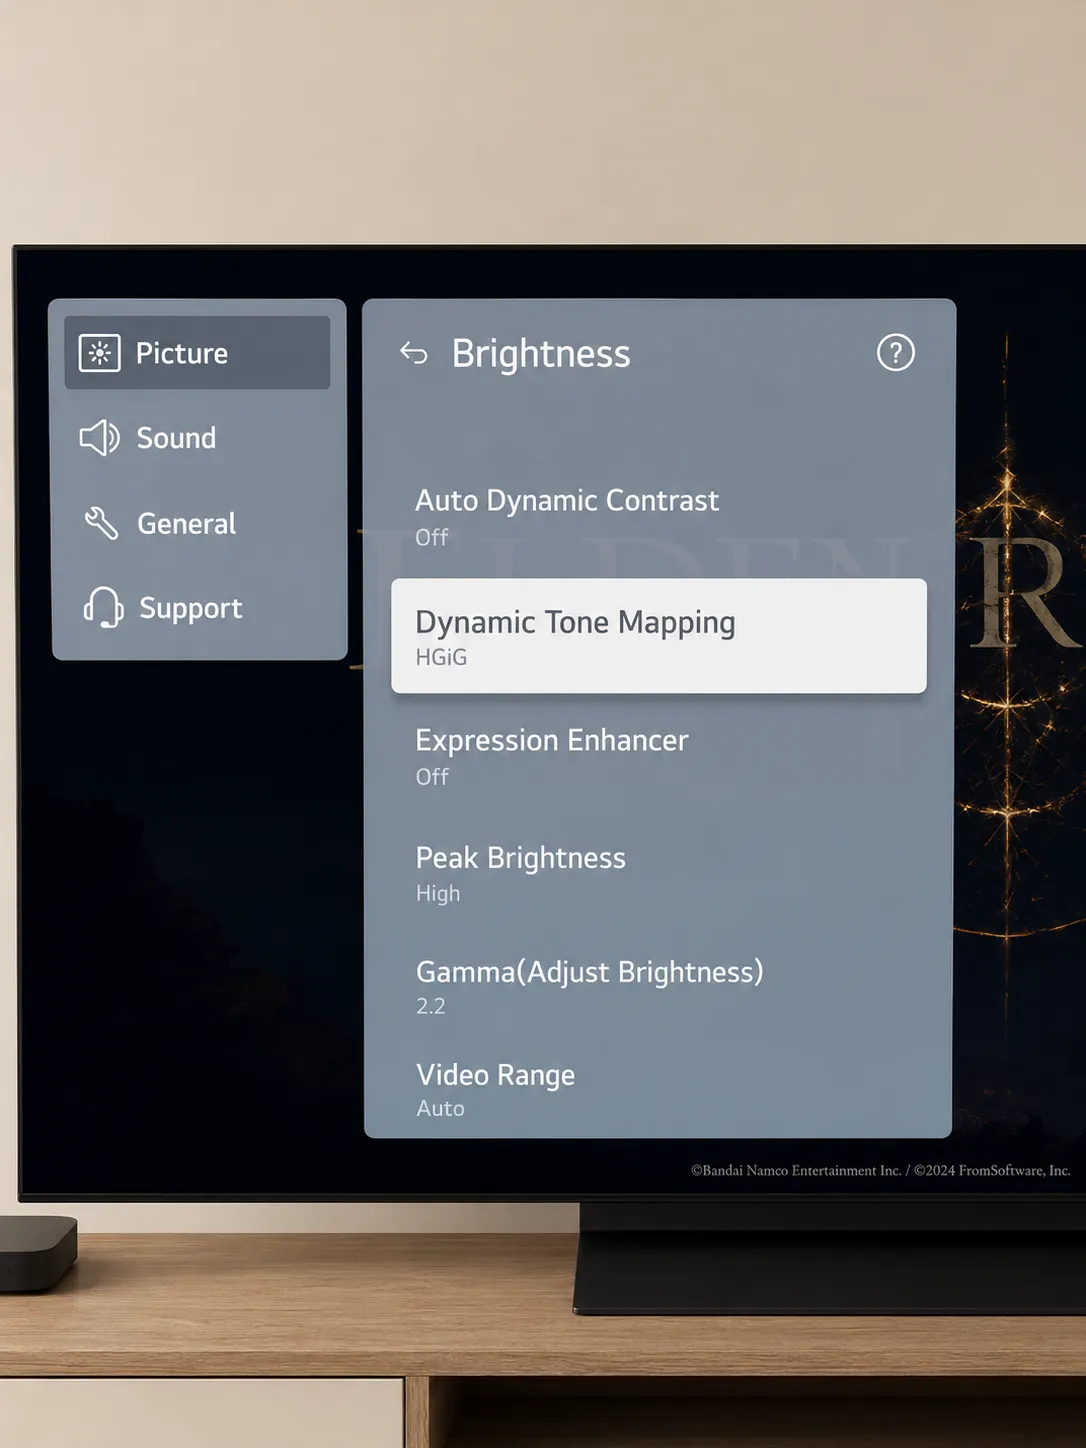
Enable HGiG first, then open Settings → Screen and Video → Video Output → Adjust HDR on the PlayStation. On each calibration screen, adjust the level until the sun symbol is only just no longer visible. This follows the calibration method described in the HGiG recommendations for HDR gaming.
If the television does not offer HGiG, do not try to force the sun symbol to disappear. Leave the television’s supported tone-mapping mode enabled and follow the instructions shown on the PlayStation calibration screen.
What Is HGiG?
HGiG stands for HDR Gaming Interest Group. It is not an HDR format, but a set of recommendations intended to make HDR games behave more consistently across consoles and televisions.
Without HGiG, both the game or console and the television may tone-map the same HDR image independently. This is sometimes called double tone mapping, and it can alter brightness, compress highlights or remove detail.
When HGiG is enabled, the television avoids applying an additional dynamic tone-mapping pass and instead relies on the console or game to produce an image matched to the display’s capabilities. Some games use the PlayStation’s system-level HDR calibration, while others provide their own calibration controls and must be configured separately.
SDR, HDR10, HDR10+ and Dolby Vision
SDR, or Standard Dynamic Range, is the traditional video used by older films and much online content. It uses a limited brightness and colour range, but can still produce an excellent image when displayed correctly. SDR content should normally remain in SDR rather than being converted into HDR by the playback device.
HDR10, usually labelled simply as HDR, supports a wider brightness range and broader colour gamut. HDR10 uses static metadata that describes the video file as a whole. The television combines this information with its own display capabilities to map the content to the brightness and colours it can reproduce.
HDR10+ extends HDR10 by adding dynamic metadata that can change from scene to scene or frame to frame. This gives a compatible television more specific information for tone-mapping each part of the programme. If the television does not support HDR10+, the content can normally still be displayed as standard HDR10 without the dynamic enhancements.
Dolby Vision also uses dynamic metadata that can vary scene by scene or frame by frame.
Dolby Vision and HDR10+ serve a similar purpose, but they are separate formats and require support from the content, playback device and television.